Cold Frame - Small


I have the plans as a PDF and as a PPT. The following instructions should be used in conjunction with the PDF document.
Before beginning this project please take a look at the following pages. These pages contain things about simple carpentry I learned. When you are finished you can visit the Main Page:
1) Wood Is Not The Size They say it is
2) The right tools are important, and they really don't cost that much
3) Technique, a few hints and tricks help make the job go easier.
The windows I used were 26.6" wide by 30.5". This should be a "standard" window.
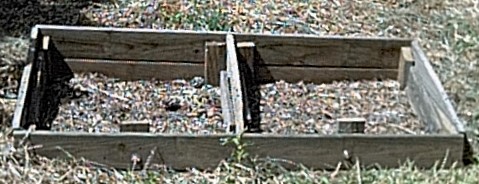
Page 1 - First cut the bottom level frame, 2 Ea. 64" front and 3 Ea. 27.1" side boards. Butt the back board up against a step, make sure this is a large flat surface to work on. Put the two side boards up against the back board, they should be against the ends of the boards. Put the front board at the front. You should now have a square frame (see the first page of the document).
Make sure that the box looks square. If you need help seeing if the box is "square", cut your 9.5 X 1.5 X 3.5" corner posts and put them in the corner. They should be nice and even.
Drill your pilot holes in and screw in the deck screws. I would suggest two or three screws per board. When you have the front board secured to the side boards, rotate everything 180 degrees and then attach the back board to the side boards.
Next take your last 27.1" board and place it in the middle. Carefully measure to get it exactly in the center. Drill your deck screws in to secure this board in place.
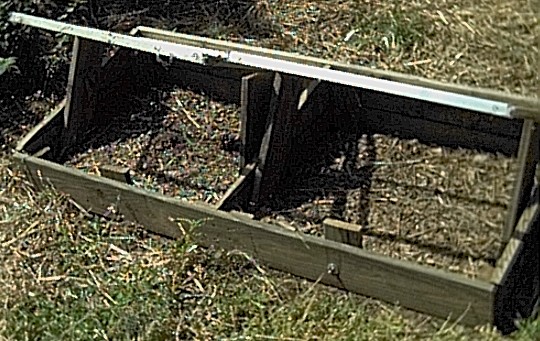
The corner posts will serve to hold the window up and help stabilize the frame. The glass window is placed inside the frame without hinges on top of the posts. This allows you to remove the windows or doors during the summer months. Be sure that the top of the posts are even with respect to the top of the frame so that when the window rests on the posts the window is level. Next secure the corner posts. Please note that the corner posts ought to be flat against the back of the cold frame. I put them flat against the sides (as you can see in the picture) and I realized I had made a mistake as soon as I fitted the glass windows in place. I had to shave the corner posts off with a jigsaw at an angle because the back of the windows were not flush with the back of the posts when I laid the windows in the frame.
Page 2 And Page 3 - Next cut the top layer. Cut the back 64" board and secure against the side posts. Next cut two 27.1" boards. Laying your tape measure, from one corner of the board to the other draw a diagonal line. Now cut along that line using your jig saw. You now have two of your side boards. Do the same thing with the second 27.1" board and you have a third board. Secure these boards in place. See page two of the diagram for cutting these boards and page three for the placement.
Cut the two 6" boards. Clamping the boards to the front drill a hole (large enough for the bolt and wing nut) through both boards. Put the wing nut and a long bolt with one washer against the wing nut and the other washer against the head of the bolt into the hole you just drilled and gently tighten. These two boards should rotate freely and they will prop up your windows an inch or two when you want your plants to get some air, but not so much they get frozen.
Next cut your four 17" boards and attach them just like you just did the previous boards. Note that the two inside boards are held by the same wing nut and bolt.
A jigsaw is a wonderful tool to have when fitting the windows in place. It is great for cutting the edge of wood that is keeping the window from fitting down just right. Also, the wood will swell up some as it sits out in the weather so keep that in mind also.
As always feel free to send me comments (my e-mail address is on the main page).